My M1 Mac setup for Python development
I recently got my lucky hands on a brand new M1 MacBook Pro as my new work machine. As an teacher, I maintain several pedagogical resources written in Python and thus needed to quickly set up an efficient work environment on this machine.
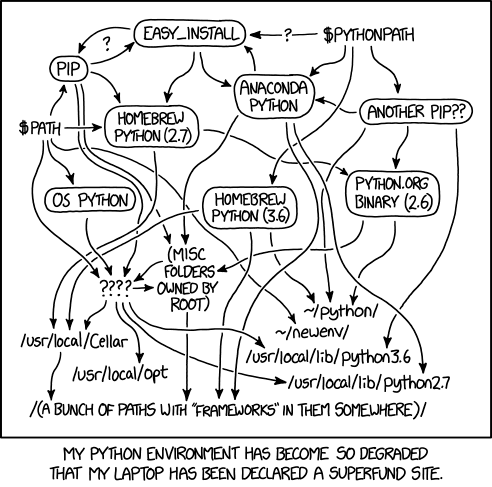
For all its qualities as a language, Python is notoriously hard to configure in a robust and efficient way. Along the years, many tools have been created to handle interpreter versions, virtual environments, project dependencies and the many chores associated with Python development. This is an ever evolving field, and the solutions listed below might very well become obsolete rather soon.
This post is a chronological overview of the choices I made to create a functional Python development environment on an M1/M2 Mac. Useful external resources are linked as references for further research.
General package management
Homebrew is the go-to solution for downloading and managing various tools on macOS, so I started by installing it.
Python interpreter
The version of macOS installed on my MacBook Pro was Monterey. Out of the box, it comes with python (2.7.18) and python3 (3.8.9) interpreters available in the /usr/bin folder. However, Python is evolving quickly and it’s great to be able to use specific versions for different projects.
pyenv is a tool that lets you easily switch between multiple versions of Python. I installed it via brew, then downloaded the most up-to-date Python version (3.10.6 for me) and made it the default global Python interpreter.
References:
Dependency management
The overall richness of its open source ecosystem means that any non-trivial Python project depends on a number of external libraries. Moreover, different versions of the same tool might be needed by specific projects, creating potential conflicts and instabilities.
The standard solution is to use virtual environments to isolate projects and their dependencies in sandboxed contexts. The venv package is one of the available solutions to this problem. It is leveraged by the tool I chose to use for project dependency management: poetry.
After installing poetry via curl, I configured it to store the virtual environment in the project’s folder (or more precisely, in a folder named .venv/ within the root directory of the project).
All my Python projects are managed through poetry with a dedicated, locally-stored virtual environment for each of them.
References:
Code utilities
Development tools like code formatters and linters are typically reused from project to project. It is thefore a good practice to install them globally rather than duplicating them in each project.
In order to avoid polluting the global Python directories, I used pipx which installs command line tools in dedicated virtual environments.
Initially, I wanted to install black and pylint this way. However, the latter didn’t play nice with Visual Studio Code (my code editor of choice) when installed elsewhere than in the project’s own virtual environment. Thus, only black was installed system-wide through pipx. On the contrary, pylint is added to each project’s virtual environment as a development dependency.
In addition, here are the VS Code settings (.vscode/settings.json) I use for configuring black and pylint in a project.
{
    "python.formatting.provider": "black",
    "python.formatting.blackPath": "~/.local/bin/black",
    "python.linting.pylintEnabled": true,
    "python.linting.enabled": true
}
References:
- https://code.visualstudio.com/docs/python/editing#_formatting
- https://code.visualstudio.com/docs/python/linting
- https://www.twoistoomany.com/blog/2020/11/24/how-i-work-pipx/
- https://stackoverflow.com/q/70488092/2380880
Jupyter notebook
My workflow includes working with Jupyter notebooks, either through a web browser or Visual Studio Code. In particular, I use the RISE extension to showcase notebooks as slides when teaching.
After struggling for a while, I gave up on trying to install the Jupyter ecosystem globally while making it available in Visual Studio Code, which uses the local virtual environment of the project. Instead, I use poetry to add jupyter as a dependency for all notebook-based projects. I also add RISE as a developement dependency for projects needing slideshows.
References:
- https://code.visualstudio.com/docs/datascience/jupyter-notebooks
- https://hippocampus-garden.com/jupyter_poetry_pipenv/
- https://ipython.readthedocs.io/en/stable/install/kernel_install.html#kernels-for-different-environments
Deep Learning
As the icing on the cake, I obviously wanted to leverage the power of the M1 architecture in my Deep Learning projects. Fortunately, both PyTorch and TensorFlow now support the M1 family of processors, so the installation process is straighforward: I simply added torch (for PyTorch) or tensorflow-macos and tensorflow-metal (for TF) as project dependencies.
The following code subsequently checks if a CUDA (NVIDIA) or Metal (Apple ARM) GPU is available for PyTorch and for TensorFlow. The M1 GPU should be successfully detected in both cases.
import torch

# Device configuration
if torch.cuda.is_available():
    device = torch.device("cuda")
    print(f"CUDA GPU {torch.cuda.get_device_name(0)} found :)")
elif torch.backends.mps.is_available():
    device = torch.device("mps")
    print("Metal GPU found :)")
else:
    device = torch.device("cpu")
    print("No available GPU :/")
import tensorflow as tf

# Device configuration
if len(tf.config.list_physical_devices("GPU")) > 0:
    print("GPU found :)")
else:
    print("No available GPU :/")
References:
- https://pytorch.org/blog/introducing-accelerated-pytorch-training-on-mac/
- https://stackoverflow.com/a/72401340
- https://pytorch.org/docs/master/notes/mps.html
- https://developer.apple.com/metal/tensorflow-plugin/
Closing thoughts
This is of course an imperfect work in progress, and things might change in the future. Meanwhile, I’m pretty happy with the current result.
I hope some of this has been useful to you. Happy Python setup ;)
References:
- https://blog.jayway.com/2019/12/28/pyenv-poetry-saviours-in-the-python-chaos/
- https://drgabrielharris.medium.com/python-how-farewell-anaconda-take-full-control-of-your-development-environment-6c4f8103980f
- https://www.ethanrosenthal.com/2022/02/01/everything-gets-a-package/
- https://news.ycombinator.com/item?id=25650140
- https://news.ycombinator.com/item?id=25647034