Dogs vs. cats (Keras)
Contents
This is a self-correcting activity generated by nbgrader. Fill in any place that says
YOUR CODE HEREorYOUR ANSWER HERE. Run subsequent cells to check your code.
Dogs vs. cats (Keras)
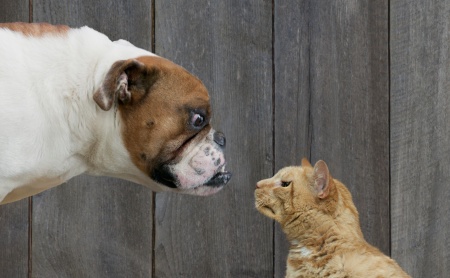
In this activity, the goal is to distinguish the animals pictured in these images between cats and dogs.
The 2,000 images used in this kata are excerpted from the Dogs vs. Cats dataset available on Kaggle, which contains 25,000 images. Here, we use a subset of the full dataset to decrease training time for educational purposes.
Environment setup
# The Python Imaging Library is needed to display images
!pip install pillow
# Import base packages
import os
import zipfile
import random
import numpy as np
import matplotlib
import matplotlib.pyplot as plt
import matplotlib.image as mpimg
import seaborn as sns
# Setup plots
%matplotlib inline
plt.rcParams['figure.figsize'] = 10, 8
%config InlineBackend.figure_format = 'retina'
sns.set()
# Import ML packages (edit this list if needed)
import tensorflow as tf
print(f'TensorFlow version: {tf.__version__}')
print(f'Keras version: {tf.keras.__version__}')

from tensorflow.keras.preprocessing.image import ImageDataGenerator, img_to_array, array_to_img, load_img
from tensorflow.keras import Model
from tensorflow.keras.models import Sequential
from tensorflow.keras.layers import Dense, Flatten, Conv2D, MaxPooling2D, Input, Dropout
from tensorflow.keras.applications import VGG16
Utility functions
def plot_loss_acc(history):
    """Plot training and (optionally) validation loss and accuracy"""

    loss = history.history['loss']
    epochs = range(1, len(loss) + 1)

    plt.figure(figsize=(10, 10))

    plt.subplot(2, 1, 1)
    plt.plot(epochs, loss, '.--', label='Training loss')
    final_loss = loss[-1]
    title = 'Training loss: {:.4f}'.format(final_loss)
    plt.ylabel('Loss')
    if 'val_loss' in history.history:
        val_loss = history.history['val_loss']
        plt.plot(epochs, val_loss, 'o-', label='Validation loss')
        final_val_loss = val_loss[-1]
        title += ', Validation loss: {:.4f}'.format(final_val_loss)
    plt.title(title)
    plt.legend()

    acc = history.history['accuracy']

    plt.subplot(2, 1, 2)
    plt.plot(epochs, acc, '.--', label='Training acc')
    final_acc = acc[-1]
    title = 'Training accuracy: {:.2f}%'.format(final_acc * 100)
    plt.xlabel('Epochs')
    plt.ylabel('Accuracy')
    if 'val_accuracy' in history.history:
        val_acc = history.history['val_accuracy']
        plt.plot(epochs, val_acc, 'o-', label='Validation acc')
        final_val_acc = val_acc[-1]
        title += ', Validation accuracy: {:.2f}%'.format(final_val_acc * 100)
    plt.title(title)
    plt.legend()
Step 1: Loading the data
# Downloading our example data, a .zip of 2,000 JPG pictures, and extracting it locally in `/tmp`
!wget --no-check-certificate \
    https://storage.googleapis.com/mledu-datasets/cats_and_dogs_filtered.zip \
    -O /tmp/cats_and_dogs_filtered.zip
# Extracting zip file to the base directory `/tmp/cats_and_dogs_filtered`
local_zip = '/tmp/cats_and_dogs_filtered.zip'
zip_ref = zipfile.ZipFile(local_zip, 'r')
zip_ref.extractall('/tmp')
zip_ref.close()

base_dir = '/tmp/cats_and_dogs_filtered'
train_dir = os.path.join(base_dir, 'train')
validation_dir = os.path.join(base_dir, 'validation')

# Directory with our training cat pictures
train_cats_dir = os.path.join(train_dir, 'cats')

# Directory with our training dog pictures
train_dogs_dir = os.path.join(train_dir, 'dogs')

# Directory with our validation cat pictures
validation_cats_dir = os.path.join(validation_dir, 'cats')

# Directory with our validation dog pictures
validation_dogs_dir = os.path.join(validation_dir, 'dogs')
Step 2: Explore data
print(f'Training cat images: {len(os.listdir(train_cats_dir))}')
print(f'Training dog images: {len(os.listdir(train_dogs_dir))}')
print(f'Validation cat images: {len(os.listdir(validation_cats_dir))}')
print(f'Validation dog images: {len(os.listdir(validation_dogs_dir))}')

# Display some images files for cats and dogs
train_cat_fnames = os.listdir(train_cats_dir)
print(train_cat_fnames[:10])
train_dog_fnames = os.listdir(train_dogs_dir)
train_dog_fnames.sort()
print(train_dog_fnames[:10])
# Parameters for our graph; we'll output images in a 4x4 configuration
nrows = 4
ncols = 4

# Index for iterating over images
pic_index = 0

# Set up matplotlib fig, and size it to fit 4x4 pics
fig = plt.gcf()
fig.set_size_inches(ncols * 4, nrows * 4)

pic_index += 8
next_cat_pix = [os.path.join(train_cats_dir, fname)
                for fname in train_cat_fnames[pic_index-8:pic_index]]
next_dog_pix = [os.path.join(train_dogs_dir, fname)
                for fname in train_dog_fnames[pic_index-8:pic_index]]

for i, img_path in enumerate(next_cat_pix+next_dog_pix):
  # Set up subplot; subplot indices start at 1
  sp = plt.subplot(nrows, ncols, i + 1)
  sp.axis('Off') # Don't show axes (or gridlines)

  img = mpimg.imread(img_path)
  plt.imshow(img)

plt.show()
Step 3 : training a model
# All images will be rescaled by 1./255
train_datagen = ImageDataGenerator(rescale=1./255)
test_datagen = ImageDataGenerator(rescale=1./255)

# Flow training images in batches of 20 using train_datagen generator
train_generator = train_datagen.flow_from_directory(
        train_dir,  # This is the source directory for training images
        target_size=(150, 150),  # All images will be resized to 150x150
        batch_size=20,
        # Since we use binary_crossentropy loss, we need binary labels
        class_mode='binary')

# Flow validation images in batches of 20 using test_datagen generator
validation_generator = test_datagen.flow_from_directory(
        validation_dir,
        target_size=(150, 150),
        batch_size=20,
        class_mode='binary')
Question
Create a CNN model able to be trained on 150x150x3 images. Show its summary with the model.summary()method.
# YOUR CODE HERE
Question
Compile and train your model to reach a validation accuracy > 70%.
# Compile and train the model
model.compile('adam',
              'binary_crossentropy',
              metrics=['accuracy'])

history = model.fit(
      train_generator,
      steps_per_epoch=100,  # 2000 images = batch_size * steps
      epochs=15,
      validation_data=validation_generator,
      validation_steps=50,  # 1000 images = batch_size * steps
      verbose=1)
# Show training history
plot_loss_acc(history)
# Retrieve final validation accuracy
val_acc = history.history['val_accuracy'][-1]

# Assert final accuracy
assert val_acc > 0.68
Step 4: Preventing overfitting
Adding data augmentation
datagen = ImageDataGenerator(
      rotation_range=40,
      width_shift_range=0.2,
      height_shift_range=0.2,
      shear_range=0.2,
      zoom_range=0.2,
      horizontal_flip=True,
      fill_mode='nearest')

img_path = os.path.join(train_cats_dir, train_cat_fnames[2])
img = load_img(img_path, target_size=(150, 150))  # this is a PIL image
x = img_to_array(img)  # Numpy array with shape (150, 150, 3)
x = x.reshape((1,) + x.shape)  # Numpy array with shape (1, 150, 150, 3)

# The .flow() command below generates batches of randomly transformed images
# It will loop indefinitely, so we need to `break` the loop at some point!
i = 0
for batch in datagen.flow(x, batch_size=1):
  plt.figure(i, figsize=(4, 4))
  imgplot = plt.imshow(array_to_img(batch[0]))
  i += 1
  if i % 5 == 0:
    break
# Adding rescale, rotation_range, width_shift_range, height_shift_range,
# shear_range, zoom_range, and horizontal flip to our ImageDataGenerator
train_datagen = ImageDataGenerator(
    rescale=1./255,
    rotation_range=40,
    width_shift_range=0.2,
    height_shift_range=0.2,
    shear_range=0.2,
    zoom_range=0.2,
    horizontal_flip=True,)

# Note that the validation data should not be augmented!
test_datagen = ImageDataGenerator(rescale=1./255)

# Flow training images in batches of 32 using train_datagen generator
train_generator = train_datagen.flow_from_directory(
        train_dir,  # This is the source directory for training images
        target_size=(150, 150),  # All images will be resized to 150x150
        batch_size=20,
        # Since we use binary_crossentropy loss, we need binary labels
        class_mode='binary')

# Flow validation images in batches of 32 using test_datagen generator
validation_generator = test_datagen.flow_from_directory(
        validation_dir,
        target_size=(150, 150),
        batch_size=20,
        class_mode='binary')
Adding Dropout
Question
Create a new model with a Dropout layer to your model just before the output layer.
# YOUR CODE HERE
Question
Compile and train your model to reach a validation accuracy > 73%.
# Compile and train the model
model.compile('adam',
              'binary_crossentropy',
              metrics=['accuracy'])

history = model.fit(
      train_generator,
      steps_per_epoch=100,  # 2000 images = batch_size * steps
      epochs=30,
      validation_data=validation_generator,
      validation_steps=50,  # 1000 images = batch_size * steps
      verbose=1)
# Show training history
plot_loss_acc(history)
# Retrieve final validation accuracy
val_acc = history.history['val_accuracy'][-1]

# Assert final accuracy
assert val_acc > 0.73
Step 5: Using a pretrained model
Question
Implement feature extraction, using the convolution base of VGG16 in the conv_basevariable.
# YOUR CODE HERE

conv_base.summary()
Question
Compile and train your model to reach a validation accuracy > 87%.
# Compile and train the model

model.compile('adam',
              'binary_crossentropy',
              metrics=['accuracy'])

history = model.fit(
      train_generator,
      steps_per_epoch=100,  # 2000 images = batch_size * steps
      epochs=15,
      validation_data=validation_generator,
      validation_steps=50,  # 1000 images = batch_size * steps
      verbose=1)
# Show training history
plot_loss_acc(history)
# Retrieve final validation accuracy
val_acc = history.history['val_accuracy'][-1]

# Assert final accuracy
assert val_acc > 0.87
TODO
Show images dimension
Put model summary on a specific slide
Visualizing intermediate layers