Dogs vs. cats (PyTorch)
Contents
This is a self-correcting activity generated by nbgrader. Fill in any place that says
YOUR CODE HEREorYOUR ANSWER HERE. Run subsequent cells to check your code.
Dogs vs. cats (PyTorch)
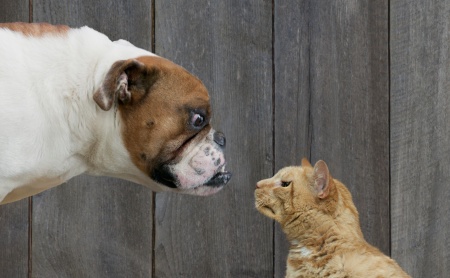
In this activity, the goal is to distinguish the animals pictured in these images between cats and dogs.
The 2,000 images used in this kata are excerpted from the Dogs vs. Cats dataset available on Kaggle, which contains 25,000 images. Here, we use a subset of the full dataset to decrease training time for educational purposes.
Environment setup
# The Python Imaging Library is needed to display images
!pip install pillow
# Import base packages
import os
import zipfile
import random
import numpy as np
import matplotlib
import matplotlib.pyplot as plt
import matplotlib.image as mpimg
import seaborn as sns
# Setup plots
%matplotlib inline
plt.rcParams['figure.figsize'] = 10, 8
%config InlineBackend.figure_format = 'retina'
sns.set()
# Import ML packages (edit this list if needed)
import torch
print(f'PyTorch version: {torch.__version__}')

import torchvision
import torchvision.transforms as transforms
import torch.nn as nn
import torch.nn.functional as F
import torch.optim as optim
from torch.utils.tensorboard import SummaryWriter

%load_ext tensorboard
Utilify functions
def plot_decision_boundary(pred_func, X, y, figure=None):
    """Plot a decision boundary"""

    if figure is None:  # If no figure is given, create a new one
        plt.figure()
    # Set min and max values and give it some padding
    x_min, x_max = X[:, 0].min() - .5, X[:, 0].max() + .5
    y_min, y_max = X[:, 1].min() - .5, X[:, 1].max() + .5
    h = 0.01
    # Generate a grid of points with distance h between them
    xx, yy = np.meshgrid(np.arange(x_min, x_max, h),
                         np.arange(y_min, y_max, h))
    # Predict the function value for the whole grid
    Z = pred_func(np.c_[xx.ravel(), yy.ravel()])
    Z = Z.reshape(xx.shape)
    # Plot the contour and training examples
    plt.contourf(xx, yy, Z, cmap=plt.cm.Spectral)
    cm_bright = ListedColormap(['#FF0000', '#0000FF'])
    plt.scatter(X[:, 0], X[:, 1], c=y, cmap=cm_bright)
Step 1: Loading the data
# Downloading our example data, a .zip of 2,000 JPG pictures, and extracting it locally in `/tmp`
!wget --no-check-certificate \
    https://storage.googleapis.com/mledu-datasets/cats_and_dogs_filtered.zip \
    -O /tmp/cats_and_dogs_filtered.zip
# Extracting zip file to the base directory `/tmp/cats_and_dogs_filtered`
local_zip = '/tmp/cats_and_dogs_filtered.zip'
zip_ref = zipfile.ZipFile(local_zip, 'r')
zip_ref.extractall('/tmp')
zip_ref.close()

base_dir = '/tmp/cats_and_dogs_filtered'
train_dir = os.path.join(base_dir, 'train')
validation_dir = os.path.join(base_dir, 'validation')

# Directory with our training cat pictures
train_cats_dir = os.path.join(train_dir, 'cats')

# Directory with our training dog pictures
train_dogs_dir = os.path.join(train_dir, 'dogs')

# Directory with our validation cat pictures
validation_cats_dir = os.path.join(validation_dir, 'cats')

# Directory with our validation dog pictures
validation_dogs_dir = os.path.join(validation_dir, 'dogs')
Step 2: Exploring the data
print(f'Training cat images: {len(os.listdir(train_cats_dir))}')
print(f'Training dog images: {len(os.listdir(train_dogs_dir))}')
print(f'Validation cat images: {len(os.listdir(validation_cats_dir))}')
print(f'Validation dog images: {len(os.listdir(validation_dogs_dir))}')

# Display some images files for cats and dogs
train_cat_fnames = os.listdir(train_cats_dir)
print(train_cat_fnames[:10])
train_dog_fnames = os.listdir(train_dogs_dir)
train_dog_fnames.sort()
print(train_dog_fnames[:10])
# Parameters for our graph; we'll output images in a 4x4 configuration
nrows = 4
ncols = 4

# Index for iterating over images
pic_index = 0

# Set up matplotlib fig, and size it to fit 4x4 pics
fig = plt.gcf()
fig.set_size_inches(ncols * 4, nrows * 4)

pic_index += 8
next_cat_pix = [os.path.join(train_cats_dir, fname)
                for fname in train_cat_fnames[pic_index-8:pic_index]]
next_dog_pix = [os.path.join(train_dogs_dir, fname)
                for fname in train_dog_fnames[pic_index-8:pic_index]]

for i, img_path in enumerate(next_cat_pix+next_dog_pix):
  # Set up subplot; subplot indices start at 1
  sp = plt.subplot(nrows, ncols, i + 1)
  sp.axis('Off') # Don't show axes (or gridlines)

  img = mpimg.imread(img_path)
  plt.imshow(img)

plt.show()
Step 3: Preparing the data
Question
Prepare the data by resizing all images to 150x150 and normalizing them.
Create a DataLoader for training data and another one for validation data.
# YOUR CODE HERE
Step 4: Training a model
Question
Create a CNN model able to be trained on 150x150x3 images. Instantiate it into the net variable.
# YOUR CODE HERE

print(net)
Step 5: Evaluating the model
Question
Compute accuracy on validation data. Store it into the val_acc variable.
Validation accuracy should be > 70%.
# Test the model
net.eval()  # eval mode (batchnorm uses moving mean/variance instead of mini-batch mean/variance)
with torch.no_grad():
    # YOUR CODE HERE
print(f'Validation accuracy: {val_acc * 100}%')

# Assert final accuracy
assert val_acc > 0.70
TODO
Add Keras version questions